If you are a car enthusiast looking for a way to boost your vehicle's performance, save money at the pump, and reduce your carbon footprint, converting your car to run on E85 ethanol might be the perfect modification. E85, a fuel blend containing up to 85% ethanol and 15% gasoline, has gained immense popularity in the tuning community and among eco-conscious drivers alike.
However, running E85 in a standard internal combustion engine designed for standard unleaded gasoline requires specific modifications. The energy content of E85 is lower than that of regular gasoline, which means your engine needs to inject roughly 30% more fuel to maintain the optimal air-to-fuel ratio. This is where an E85 conversion kit comes into play.
In this comprehensive, 2500-word step-by-step guide, we will walk you through everything you need to know about installing an E85 conversion kit in your car. From understanding how the kits work and gathering the necessary tools to the meticulous step-by-step installation process and post-installation maintenance, we have you covered.
Disclaimer: While this guide is designed to be as detailed and helpful as possible, modifying your vehicle's fuel system carries inherent risks. Always consult your vehicle's service manual, and if you are not comfortable performing these modifications yourself, please seek the assistance of a certified professional mechanic.
---
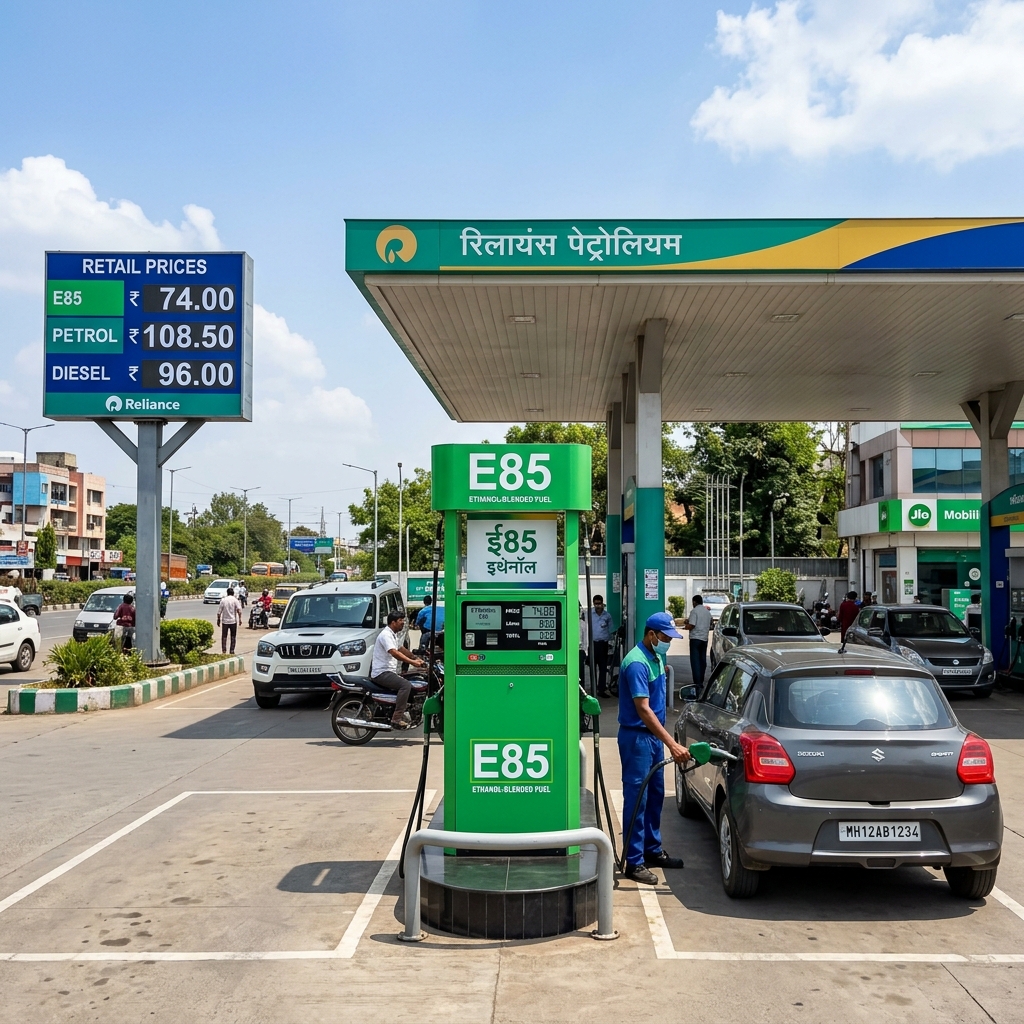
1. Understanding E85 Conversion Kits
Before diving into the installation process, it is crucial to understand what an E85 conversion kit actually is and how it works seamlessly with your vehicle's engine management system.
What is an E85 Conversion Kit?
An E85 conversion kit, often referred to as a flex-fuel kit, is an electronic plug-and-play piggyback system designed to intercept the signals sent from your car's Engine Control Unit (ECU) to the fuel injectors.Standard gasoline engines are programmed to inject a specific volume of fuel based on various sensor readings (mass airflow, throttle position, oxygen sensors, etc.). Because E85 requires a larger volume of fuel to achieve the same stoichiometric combustion, the factory ECU programming is insufficient when running E85.
How Does it Work?
The conversion kit acts as a middleman. It plugs directly into your factory fuel injector connectors. When the ECU sends a signal to open the fuel injector for a specific duration (known as pulse width), the E85 control module intercepts this signal, lengthens the pulse width, and then sends the modified signal to the injector. This increased pulse width keeps the injector open slightly longer, delivering the necessary 30% extra fuel required for E85 combustion.Modern, advanced conversion kits are "true flex-fuel" systems. They utilize an inline ethanol content sensor installed in your fuel lines. This sensor continuously reads the exact percentage of ethanol flowing through the system (whether it's 10% from standard pump gas, 50% from a mixed tank, or 85% from pure E85) and adjusts the injector pulse width in real-time. This means you can fill up with regular gasoline, E85, or any mixture of the two without ever having to manually switch maps or adjust settings.
Do You Need a Kit?
If your car does not have a yellow gas cap or flex-fuel badging from the factory, it is not equipped to run E85 safely. Running E85 without a kit or proper ECU tuning will result in a severely lean air-fuel mixture, leading to engine knocking, overheating, and catastrophic engine failure. Therefore, a conversion kit or a custom ECU tune is mandatory.---
2. Pre-Installation Prerequisites and Safety
Working with your car's fuel system requires extreme caution. Gasoline and ethanol are highly flammable, and fuel systems operate under high pressure. Preparation is key to a safe and successful installation.
Tools Required
Gather the following tools before starting the installation. Having everything within reach will make the process much smoother: * Socket set and ratchets (metric and standard, depending on your vehicle) * Wrenches (various sizes) * Flathead and Phillips screwdrivers * Pliers (needle-nose and regular) * Multimeter (for checking grounds and voltage, if necessary) * Zip ties (for securing wiring and the control module) * Shop towels or rags (for cleaning up spilled fuel) * Fuel line disconnect tools (mandatory if you are installing an inline ethanol sensor) * Safety glasses and nitrile gloves * Fire extinguisher (keep a Class B fire extinguisher nearby just in case)Safety Precautions
* Work in a well-ventilated area: Never work on a fuel system in an enclosed garage. Ensure you are outdoors or in a garage with the doors fully open to allow fumes to dissipate. * No sparks or open flames: Absolutely no smoking. Keep all open flames, space heaters, and spark-producing tools far away from the work area. * Let the engine cool: Never work on a hot engine. The exhaust manifold and other components can remain hot enough to ignite spilled fuel long after the engine is turned off. Allow the car to sit for a few hours before beginning.Inspecting Current Fuel System Components
Before installing the kit, evaluate your existing fuel system. While the kit handles the electronic side, your mechanical components must be up to the task: * Fuel Pump: E85 requires more fuel volume. If your factory fuel pump is old or weak, it may not be able to keep up with the increased demand, leading to fuel starvation at high RPMs. Many enthusiasts choose to upgrade to an E85-compatible high-flow fuel pump (like a Walbro 450) concurrently. * Fuel Injectors: Ensure your factory injectors have the flow capacity (measured in cc/min or lb/hr) to handle an extra 30% duty cycle. If your injectors are already maxed out on gasoline, you will need larger injectors. * Fuel Lines: E85 can be corrosive to older rubber fuel lines not designed for ethanol. While most modern cars (post-2000) have ethanol-resistant lines, it's worth inspecting them for cracks or wear.---
3. Step 1: Disconnecting the Battery and Relieving Fuel Pressure
This is arguably the most important safety step in the entire process.
Relieving Fuel Pressure
Your fuel system remains pressurized even when the car is off. If you disconnect a fuel line or an injector without relieving this pressure, fuel will spray everywhere. 1. Locate your car's fuse box (usually under the hood or in the driver's side footwell). 2. Consult the fuse box diagram (often found on the inside of the fuse box cover or in your owner's manual) to locate the fuse or relay for the Fuel Pump. 3. Remove the fuel pump fuse or relay. 4. Start the engine. The car will run for a few seconds on the residual fuel in the lines and then stall out. 5. Attempt to crank the engine one more time for 3-5 seconds to ensure all pressure is completely relieved. 6. Turn the ignition key to the OFF position.Disconnecting the Battery
Now that the fuel pressure is relieved, disconnect the battery to prevent any electrical sparks or short circuits while you are manipulating wiring. 1. Locate your car's battery. 2. Using a wrench or socket, loosen the nut on the Negative (-) battery terminal (the black cable). 3. Remove the negative cable from the battery post and tuck it away so it cannot accidentally spring back and make contact with the terminal.---
4. Step 2: Locating the Fuel Injectors and Connectors
Depending on your vehicle's engine layout (inline-4, V6, V8, Boxer), the fuel injectors may be easily accessible right on top, or they may be buried under intake manifolds and engine covers.
Removing the Engine Cover
If your engine has a plastic decorative cover, remove it. This usually involves removing a few bolts, nuts, or simply pulling upward to release rubber grommets. Set the cover aside safely.Identifying the Fuel Rail and Injectors
Look for the fuel rail—a metal or high-strength plastic tube that delivers fuel to the injectors. The fuel rail will be bolted to the intake manifold, and the fuel injectors will be seated between the fuel rail and the intake runners.Each fuel injector will have an electrical connector plugged into it. These connectors send the pulse width signal from the ECU.
Identifying Your Connector Type
E85 conversion kits are ordered based on the specific type of injector connector your car uses. Common types include: * EV1 (Jetronic/Minitimer) * EV6 / EV14 (USCAR) * Nippon Denso * Honda / Acura specific * Toyota specificVerify that the connectors on your new E85 conversion harness match the shape and pin layout of your factory connectors before proceeding.
---
5. Step 3: Installing the E85 Conversion Kit Harness
This is the core of the installation process. You will be installing the conversion kit's wiring harness inline between the factory ECU connectors and the fuel injectors.
Disconnecting Factory Injector Clips
1. Starting with the first cylinder, locate the electrical clip attached to the fuel injector. 2. Most connectors have a metal retaining clip or a plastic locking tab. * For metal wire clips (common on EV1), press the wire inward or use a small flathead screwdriver to carefully pry it off (don't lose it!). * For plastic locking tabs (common on EV6/USCAR), depress the tab firmly and pull the connector straight up and off the injector. 3. Be gentle. The plastic connectors can become brittle from years of engine heat. Do not yank on the wires themselves; pull only on the plastic connector housing.Connecting the E85 Harness
The E85 conversion harness acts as an extension cord with a brain. For each cylinder, the kit will have a male connector and a female connector. 1. Take the Female connector from the E85 kit and plug it directly onto the top of the fuel injector. Push down firmly until you hear or feel a definitive "click," indicating the locking tab has engaged. 2. Take the Male* connector from the E85 kit and plug it into the *Factory Female connector that you just removed from the injector. Again, ensure it clicks into place securely. 3. Repeat this process for every single cylinder (e.g., four times for a 4-cylinder engine, eight times for a V8).Routing the Wiring Safely
Once all connectors are plugged in, you will have a significant amount of new wiring in your engine bay. Proper cable management is crucial for safety and reliability. 1. Bundle the new wiring harness together neatly. 2. Route the wiring harness away from sources of extreme heat, such as the exhaust manifold, turbocharger, or EGR tubes. Heat will melt the wire insulation and cause a short circuit. 3. Route the wiring away from moving parts, such as the serpentine belt, alternator, cooling fans, and throttle linkages. 4. Use high-quality zip ties to secure the wiring harness to existing factory wire looms, brackets, or the fuel rail itself. Do not pull the zip ties so tight that they crush the wires; just snug enough to prevent movement.---
6. Step 4: Connecting the Ground Wire
Electronic devices require a solid ground to function properly. The E85 control module is no exception. A poor ground will lead to erratic behavior, misfires, or the kit failing to turn on altogether.
1. Locate the ground wire extending from the E85 control module (usually a black wire with a ring terminal at the end). 2. Find a suitable grounding point on the vehicle's chassis or engine block. A factory grounding point (where you see other black wires bolted to the metal body) is ideal. Alternatively, you can use an existing bolt on the chassis or strut tower. 3. Ensure the grounding point is free of paint, rust, and grease. If necessary, use a piece of sandpaper or a wire brush to expose bare metal for maximum conductivity. 4. Remove the bolt, place the ring terminal of the ground wire over the hole, and reinstall the bolt tightly.
---
7. Step 5: Mounting the Control Unit (E85 Module)
The E85 control unit contains the microprocessor that performs the pulse width calculations. It needs to be mounted securely in a safe location.
Finding a Safe Location
* Keep it dry: While most modules are weather-resistant, do not mount it in a place where it will be submerged in water or directly subjected to high-pressure water during engine washes (e.g., low in the engine bay or directly behind the grille). * Keep it cool: Avoid mounting it directly above the exhaust manifold or turbocharger. The firewall or the side of the engine bay near the fuse box or battery are usually safe bets. * Accessibility: Mount it in a location where you can easily see its LED indicator lights (if applicable) for troubleshooting.Securing the Module
1. Once you have selected a location, clean the mounting surface. 2. Use the supplied mounting brackets, heavy-duty double-sided mounting tape (like 3M VHB), or zip ties to secure the module firmly. 3. Ensure the module will not vibrate excessively or bounce around while driving.---
8. Step 6: Installing the Ethanol Content Sensor (If Applicable)
If you purchased a standard piggyback kit that relies on manual adjustment or basic lambda learning, you can skip this step.
However, if you purchased a premium "True Flex-Fuel" kit, you must install the inline ethanol content sensor. This sensor is what makes the system truly adaptive.
Splicing into the Fuel Line
The ethanol sensor needs to be installed in the fuel line to sample the fuel. It is highly recommended to install the sensor on the fuel return line (the line bringing unburnt fuel back to the tank) rather than the high-pressure feed line, as this minimizes flow restriction to the injectors.Note: Some modern returnless fuel systems require installation on the feed line. Consult your specific kit's instructions.
1. Identify the correct fuel line. 2. Using fuel line disconnect tools (for quick-connect fittings) or wrenches (for threaded fittings), disconnect the fuel line in a convenient location. Keep shop towels handy to catch residual fuel. 3. Install the supplied fuel line adapters/fittings onto the ethanol content sensor. 4. Connect the factory fuel lines to the fittings on the sensor. Ensure all connections are fully seated and locked. 5. Secure the sensor to the chassis or a bracket using zip ties to prevent it from dangling or rubbing against other components.
Connecting the Sensor Harness
1. Plug the specific wiring harness from the E85 control module into the electrical connector on the ethanol content sensor. 2. Route and secure this wire away from heat and moving parts, just as you did with the main injector harness.---
9. Step 7: Reconnecting the Battery and Initial Priming
With all wiring connected, grounded, and secured, it is time to restore power to the vehicle and prime the fuel system.
1. Reinstall the Fuel Pump fuse or relay that you removed in Step 1. 2. Reconnect the Negative (-) battery cable to the battery post and tighten it securely with a wrench. 3. Get into the driver's seat and insert the key. 4. Turn the ignition key to the ON / RUN* position, but *DO NOT START THE ENGINE. 5. Listen for the fuel pump humming. It should prime the system for a few seconds and then shut off. 6. Turn the key off, and then back to the ON position again. Repeat this 3 to 4 times to build full fuel pressure in the rails and lines.
The Leak Check (Crucial)
While the system is fully pressurized (key in the ON position), get out of the car and meticulously inspect every single connection you made: * Check around every fuel injector where the kit plugs in. * Check the connections at the ethanol content sensor (if installed). * Use a flashlight and look closely. Even a single drop of fuel or a strong smell of raw gasoline indicates a leak. * If you find a leak: Turn the key off immediately, relieve fuel pressure again, and fix the loose connection or replace the damaged O-ring before proceeding. Do not start the car with a fuel leak!---
10. Step 8: Starting the Engine and Calibration
If there are no leaks, you are ready for the initial startup.
Starting on Gasoline First
It is highly recommended that you perform this installation when your fuel tank is filled with standard gasoline (E10 or unleaded), not E85.1. Turn the key and start the engine. 2. The engine should start up and idle smoothly, just as it did before the installation. 3. Check the E85 control module. Most units feature LED lights to indicate status. A solid green light usually indicates power and proper connection. A red or flashing light indicates an error (such as a bad ground or a disconnected injector). Consult your kit's manual to interpret the LED codes.
The Calibration/Learning Process
* True Flex-Fuel Kits: If you have an inline sensor, there is no calibration required. The module reads the ethanol content (which is currently ~10% from the gasoline) and makes zero adjustments. You are ready to drive to the gas station and fill up with E85. The sensor will detect the change in real-time as the E85 reaches the engine. * Standard/Auto-Learning Kits: Some kits without a sensor require a learning period. They rely on the factory oxygen sensors to detect lean conditions and gradually adjust the pulse width. Let the car idle for 10-15 minutes on gasoline to ensure the kit establishes a baseline. * Manual Adjustment Kits: Some older or basic kits have a potentiometer (a small dial) that you must turn manually with a screwdriver to switch between Gas and E85 modes. Do not switch it to E85 mode until you actually have E85 in the tank.Transitioning to E85
Once you have verified the car runs perfectly on gasoline with the kit installed, drive to an E85 pump. 1. Run your tank as low as comfortably possible on gasoline. 2. Fill the tank completely with E85. 3. Start the car. It may take a minute or two of idling or light driving for the E85 to make its way from the tank, through the lines, and into the engine. 4. If you have a flex-fuel sensor kit, the transition will be seamless. The ECU and E85 module will adjust automatically. You might notice the exhaust smelling slightly sweet (like alcohol or popcorn)—this is completely normal.---
11. Post-Installation Maintenance and Tips
Running E85 is fantastic for performance, but ethanol has different chemical properties than gasoline, requiring a few adjustments to your maintenance routine.
Fuel Filter Replacements
Ethanol is an excellent solvent and cleaner. When you first switch to E85, it will strip years of accumulated gasoline deposits, varnish, and sludge from the walls of your gas tank and fuel lines.All this debris will be sent directly into your fuel filter. It is highly recommended to replace your fuel filter after the first 500 to 1,000 miles of running E85 to prevent it from clogging. After that initial cleaning phase, you can resume normal fuel filter replacement intervals.
Oil Change Intervals
E85 can sometimes lead to increased fuel dilution in your engine oil, especially during cold starts where the engine runs rich to get up to temperature. E85 also produces more moisture during combustion. It is generally recommended to shorten your oil change intervals when running E85 exclusively. If you previously changed your oil every 7,500 miles, consider dropping it to 4,000 or 5,000 miles. Always use a high-quality synthetic oil.Cold Weather Starting
Ethanol does not vaporize as easily as gasoline in cold temperatures. If you live in a climate with harsh winters, you may experience extended cranking times or rough idling on cold mornings when running full E85 (85% ethanol).To combat this: * Many gas stations in cold climates switch to "Winter Blend" E85 (which is actually E70 or E60) during the winter months to aid in vaporization. * If you have a flex-fuel kit, you can simply mix in a few gallons of premium unleaded gasoline with your E85 fill-up during the winter. Dropping the overall ethanol content to 50-60% will dramatically improve cold starting while still retaining most of the performance benefits.
Monitor Fuel Pump Health
As mentioned earlier, E85 requires more fuel flow. Keep an ear out for a whining fuel pump, or if you experience a sudden loss of power at high RPMs, it may be a sign that your factory fuel pump is struggling and needs to be upgraded to an E85-compatible high-flow unit.---
Conclusion
Installing an E85 conversion kit is one of the most cost-effective ways to unlock hidden horsepower, increase engine safety (due to E85's high octane rating and cooling properties), and utilize a renewable fuel source. By carefully following these step-by-step instructions, adhering strictly to safety protocols regarding fuel pressure and battery disconnection, and ensuring all electrical connections are secure and properly routed, you can successfully perform this modification in your own garage.
Welcome to the world of corn-fed horsepower! Enjoy the immediate throttle response, the cooler engine temperatures, and the sweet smell of ethanol exhaust. Drive safely!